
BEFORE YOU START CUSTOMIZING
If you plan to make some modifications to the code of the theme, will be better to make them via the child theme. If you make modifications directly to the parent theme, you will lose them when the theme is updated. When you make modifications inside of the child theme instead, you can update the parent theme without losing any change you have made.
Child theme you’ll find in a “thanx-child.zip”.
More information about child themes you can find in WordPress Codex- Child_Themes.
Install Theme
To install this theme it is essential to have a working version of WordPress already installed. For the information about WordPress platform installing, please see the WordPress Codex. After you download the “thanx.zip” file from Themeforest you will have all the necessary files . Then you should extract the “thanx.zip” file and you will find the theme zip file called “thanx.zip”inside. You need to install this file.
- documentation
- Licensing
- theme
- thanx.zip Theme file
- README FIRST.html
You can install the theme in two ways: via WordPress, or via FTP. If you have trouble installing the theme via WordPress, please proceed with installing it via FTP and the problem will be solved. Follow the steps below to install via WordPress.
- Log in to the WordPress Administration
- Go to “Appearance › Themes › Add New › Upload Theme”
- Browse and select theme zip folder called “thanx.zip” (is located inside of downloaded zip package)
- Press INSTALL NOW button
- Activate theme with Activate link
Install via FTP
- Log into your hosting space via an FTP software
- Unzip the theme/thanx.zip file and use the extracted thanx theme folder
- Upload the extracted thanx theme folder into wp-content themes in your wordpress installation
- Activate the newly installed theme. Go to Appearance Themes and activate the installed theme.
- ftp folder
- wp-includes
- wp-admin
- wp-content
- themes
- thanx
- themes
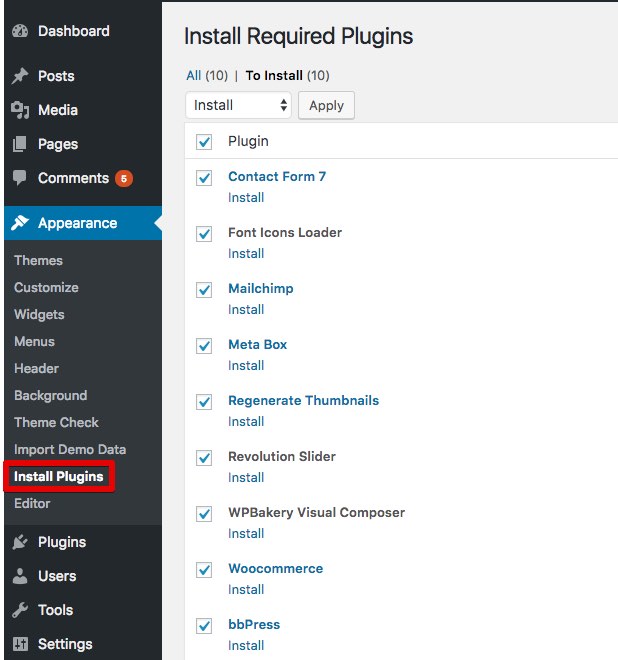
Required Installation
TO ADD THE NEEDED FUNCTIONALITY TO THE THEME IS NECESSARY TO ACTIVATE THE REQUIRED PLUGINS.
- Go to “Appearance › Install Plugins”
- Install and activate required plugins
One click import
You can either start building your site from scratch, or import one of our demo sites and then modify it to fit your needs. We will now explain how to do the latter.
thanx comes with one-click import module. Here’s what you need to do:
- Login to WordPress admin
- Go into admin panel > Apperance > Import Demo Data
- Choose the demo site that you wish to import and click on the “Import Demo” button.
Import troubleshooting
Many issues that you may run into such as; white screen, demo content fails when importing, empty page and other similar issues are all related to low PHP configuration limits.
The solution is to increase the PHP limits.
You can do this on your own .
- Find the php.ini file in your Server config files.
- For WAMP, its in apache2/bin/apache2.2.22/bin/php.ini
- Go to the line “max_execution_time=30” .
- Change it to 360 or any other large value.
Or contact your web host and ask them to increase those limits to a minimum as follows
- max_execution_time 360
- memory_limit 128M
- post_max_size 32M
- upload_max_filesize 32M
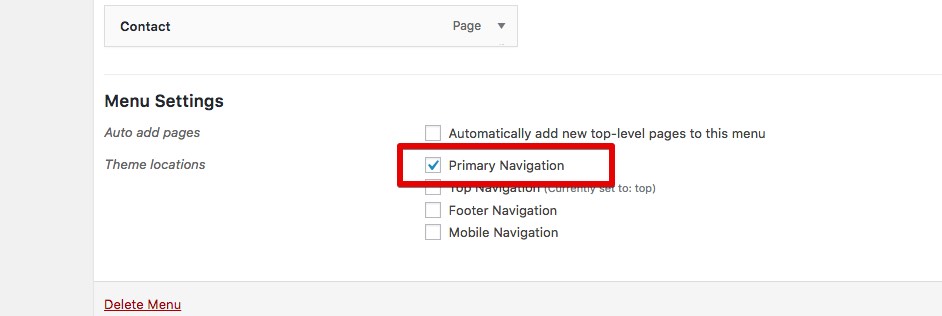
Menu settings
Specify the primary menu in Apperance – Menu
Theme Settings
To access the live Customizer, you may select the Customize button in the admin bar dropdown or select “Customize” from the Dashboard menu. Note that you must be logged in as a site administrator in order to access the controls.
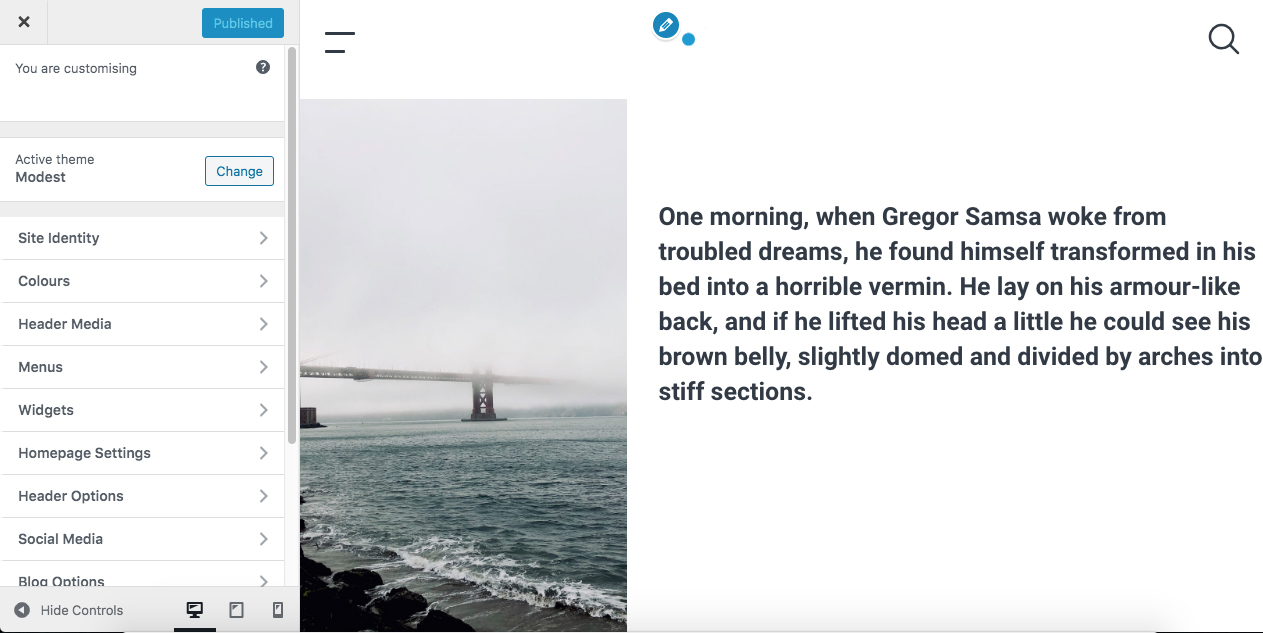
1. Site Identity
Set your logo, mobile logo, site title, tagline and the site icon. You can also elect to retina-fy your logo. Site title and tagline will appear in Header Media if you will turn it on in Header Options, so here you can select color you want.
2. Colours
Easily manipulate the theme accent color and other elements throughout the theme with the color picker in this tab. All changes are live site previewing.
3. Homepage Settings
Here you can choose what’s displayed on the homepage of your site. One will become the homepage, and the other will be where your posts are displayed. By default in the demo Homepage set to Homepage and Posts page set to With Sidebar.
4. Menus
thanx theme has only one location where you can set menu. By default Main Menu is set to: Main Menu. Just click on button in header to open menu to see all changes live.
5. Header Media
First of all you should go to homepage, because header media is working only there. Then go to Header Options and activate Header Media. Now when everything is done, you can easily set image or video to your home page. And as you can see site title and tagline will appeared.
6. Header Options
Here you can find all colors associated with the header, menu and search pop-ups.
7. Footer Options
Don’t worry, if you have more widgets than in thanx demo, we will fix it next, now in this options we can change footer widget layout, site info and all colors associated with the footer.
8. Widgets > Footer Widgets Columns
Here you can change all widgets in footer.
9. Widgets > Primary Sidebar
First of all go to Posts page that you picked in Homepage Settings, by default it is With Sidebar page in Main Menu. Here you can add or remove widget you want. If you will remove all widgets, content of the page will be full width.
10. Blog Options
First of all go to Posts page that you picked in Homepage Settings, by default it is With Sidebar page in Main Menu. Here you can change posts columns, show author name, categories, date, tags and read more button for posts.
11. Portfolio
First of all go to Portfolio Post Type Archive page, which is by default called Classic Masonry. In Portfolio Options you can change Portfolio style, number of columns for desktop, tablet and mobile screen sizes. Also you can show categories and change overlay background color, which is available for Creative Masonry and Without Space styles:
Portfolio slug and Portfolio Category slug give you the opportunity to change url for your Portfolio Post Type Archive and its category urls:
example.com/portfolio/
example.com/portfolio_category/art/
12. Social Media
Social icons appear in menu, search pop-ups and in footer. In the options you can easily activate social icons and add links for them, don’t forget to add http:// to links, except mail, there you can use mail@domain.com.
13. Font Options
Easily modify the fonts throughout the theme – choosing from the Google fonts library, and change font weight for headings and body text.
Page Templates
Our Theme has the following templates built into the theme and can be applied by creating and saving a page in WordPress.
- Default Template
- Blank Template
- Featuring Image Template
Default Template
It’s a simple template with responsive width.
Blank Template
Full width page template for creating from scratch.
Featuring Image Template
Go to “Pages” in your WordPress Dashboard and create a new page. Let’s call it Test Page and choose Featuring Image Template:
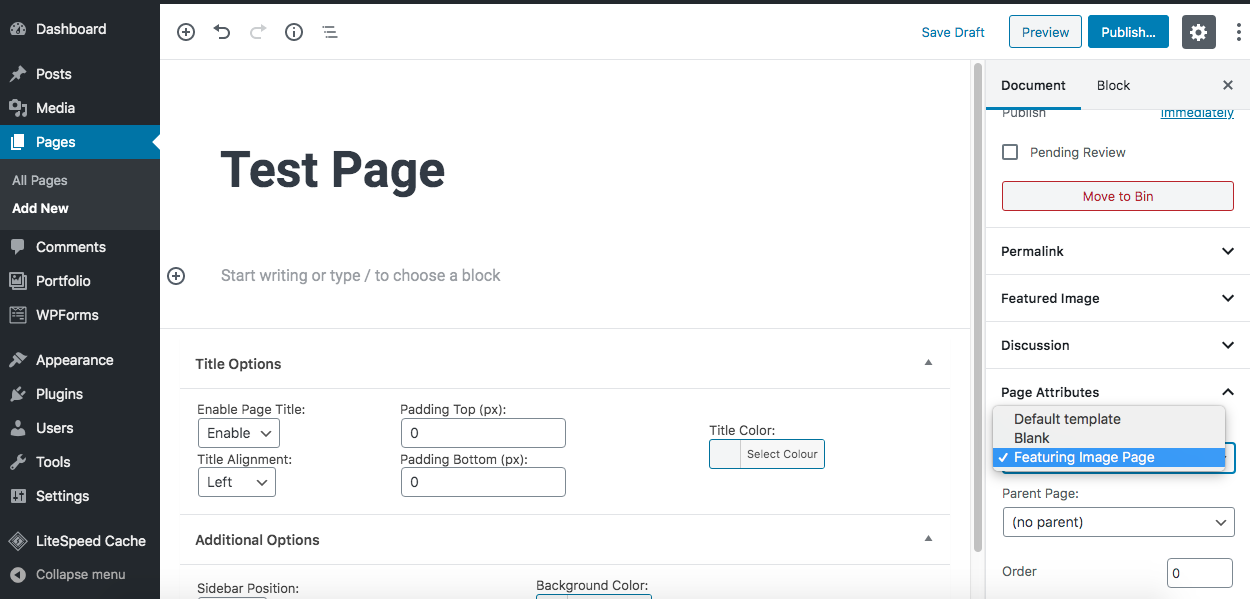
Then set Featured image for this page:
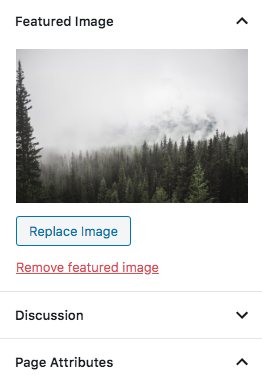
Now let’s go to Preview and look what happened:
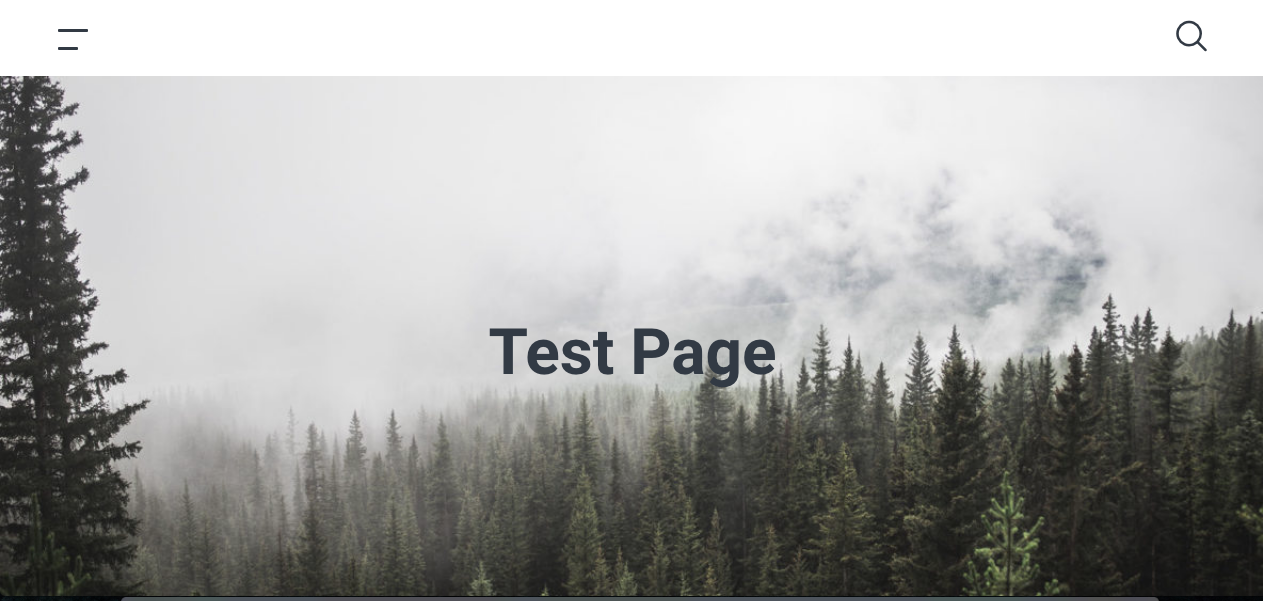
We have our featured image with parallax effect and title that we gave to this page.
Post Formats
Our Theme has the different post formats built into the theme and can be applied by creating and saving a post in WordPress.
- Aside
- Gallery
- Link
- Image
- Quote
- Standard
- Video
- Audio
Go to Posts in your admin menu and add new post. Let’s call it Test Post. In document settings you can find Post Formats:
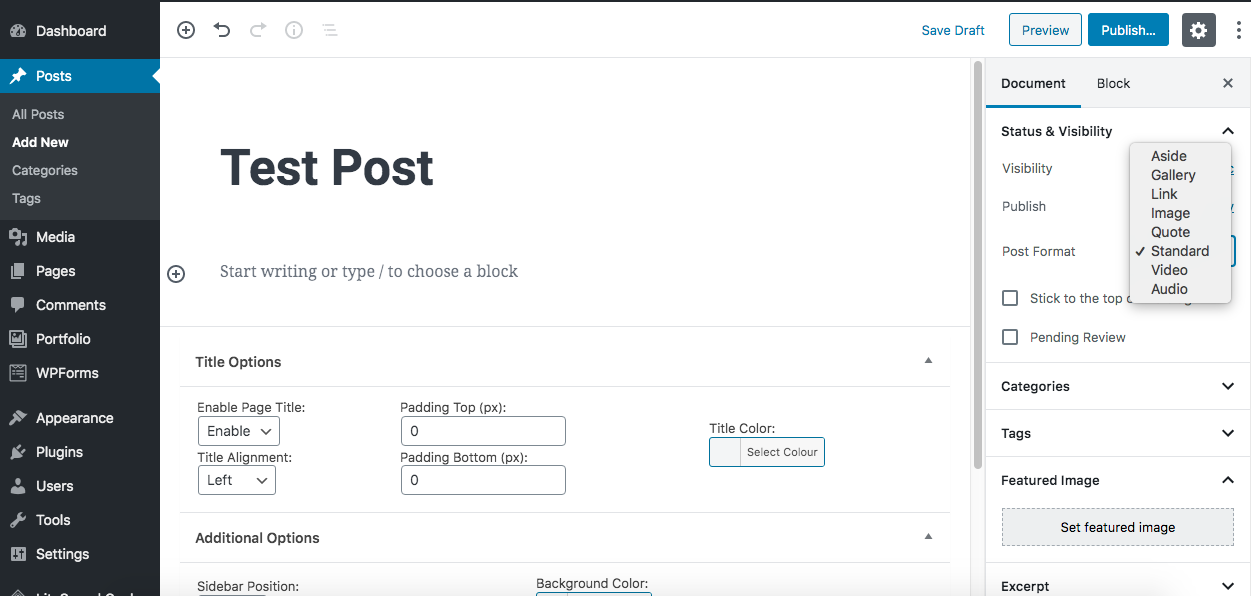
Aside
Typically styled without a title and featured image. Similar to a Facebook note update.
Gallery
A gallery of images. Post will show image gallery with slider in your Posts Page. So let’s create our Gallery Post, choose Gallery Post Format in document settings and add Gallery block in Gutenberg editor and choose some pictures. You can edit columns that you want:
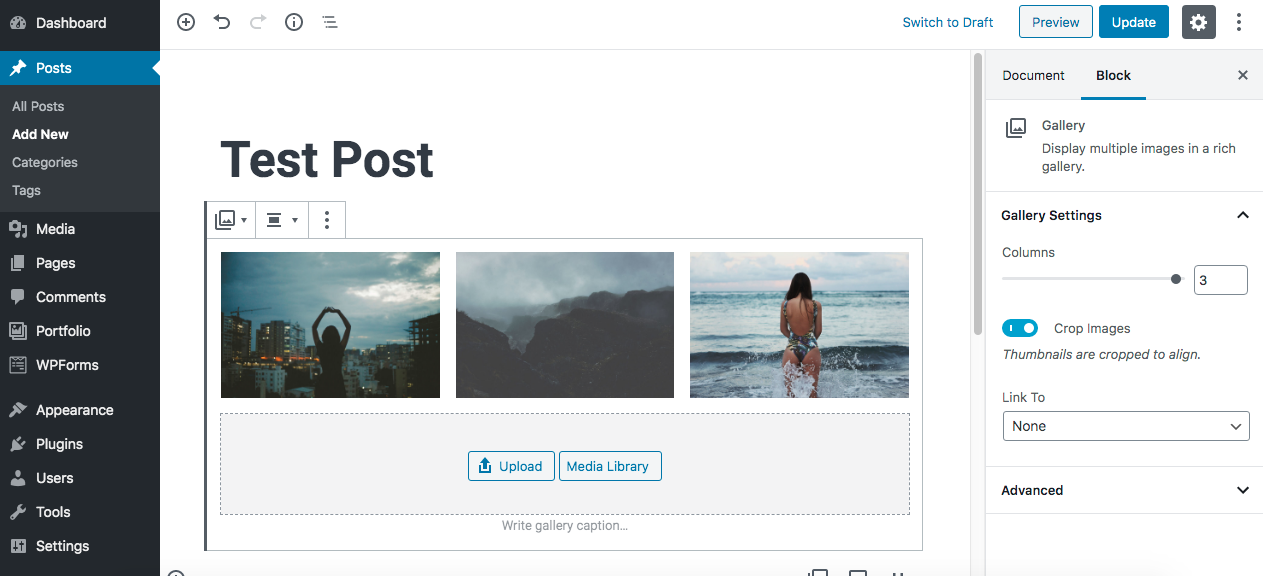
Update the post. And let’s look how it will be looking in your Posts Page (by default With Sidebar):
Link
A link to another site. Just add link inside post content. It hasn’t featured image, title, author, categories, date, tags.
Image
A single image post. Choose an Image block in Gutenberg editor and pick a picture from media library or insert from url. You also can upload a new image file.
Quote
A quotation. Probably will contain a blockquote holding the quote content. Choose an Quote block in Gutenberg editor.
Standard
The default post format. It It has featured image, title, author, categories, date, tags and post content.
Video
A single video or video playlist.You can use Video block or embeds blocks, as YouTube, Vimeo, VideoPress.
Audio
An audio file or playlist. Could be used for Podcasting. You can use Audio block or embeds blocks, as SoundCloud, Spotify, MixCloud.
Metaboxes
thanx Metaboxes are used for editing single posts, pages and portfolio posts. Do not confuse with Customizer settings, those Post and Portfolio options was used for archive pages, not single. All metaboxes options are individual for every page, post, portfolio post:
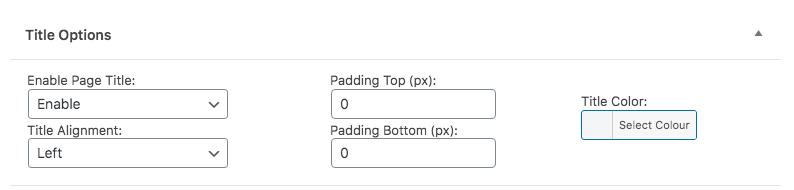
Title Options
You can easily enable or disable title, choose its alignment, vertical paddings and color.
Additional Options
You can add sidebar with widgets, which you set in Customizer > Widgets > Primary Sidebar, just choose location. Also you can edit background color of page, post, portfolio.

Options for Posts
Options that exist only for single posts. You can activate, what you want in your frontend to be shown, as featured image, author name, categories, date, tags, author info, post navigation.

Options for Portfolio
Options that exist only for single portfolio posts. You can activate, what you want in your frontend to be shown, as featured image, categories, portfolio navigation.

Preview before updating the page.Widgets settings
- Advanced Recent Posts
- Contact Info Widget
- Recent Portfolio Posts
- Portfolio Posts Slider
Using the Widgets
To employ a widget, simply go to your Widgets editor (located in your WordPress Dashboard in the “Appearance” menu) and drag your widgets into the specified widget areas or use Customizer > Widgets.
Gutenberg Blocks
thanx Gutenberg Blocks is a building content plugin for the WordPress Gutenberg Block Editor. All blocks are created specially for thanx Theme while maintaining a beautiful design and minimalist style.
Let’s go to “Pages” in your WordPress Dashboard and create a new page. thanx Gutenberg Blocks plugin consists of 12 blocks:
- thanx Special Button
- Icon Pick
- Featured Box
- Team Members
- Social Profiles
- Contact Info
- thanx Scroll Animation
- thanx Latest Posts
- Post Carousel
- thanx Portfolio Posts
- Widget Portfolio Slider
- Widgets and Post Grid
Theme Special Button
Prompt visitors to take action with a special button-style link. Try to choose thanx Special Button and change settings you want. You can edit vertical and horizontal paddings, apply transition and its timing, apply border, color settings and its hover color settings. Don’t forget to use all colors to make it work perfect.
Icon Pick
thanx Icon Pack consist of 57 icons. Try to choose Icon Pick and change settings you want. You can select icon you want, edit its size, add link, edit color.
Featured Box
Inside the block are Featured Icon Blocks, you can easily add or remove it, change columns for desktop, tablet and mobile screen sizes:
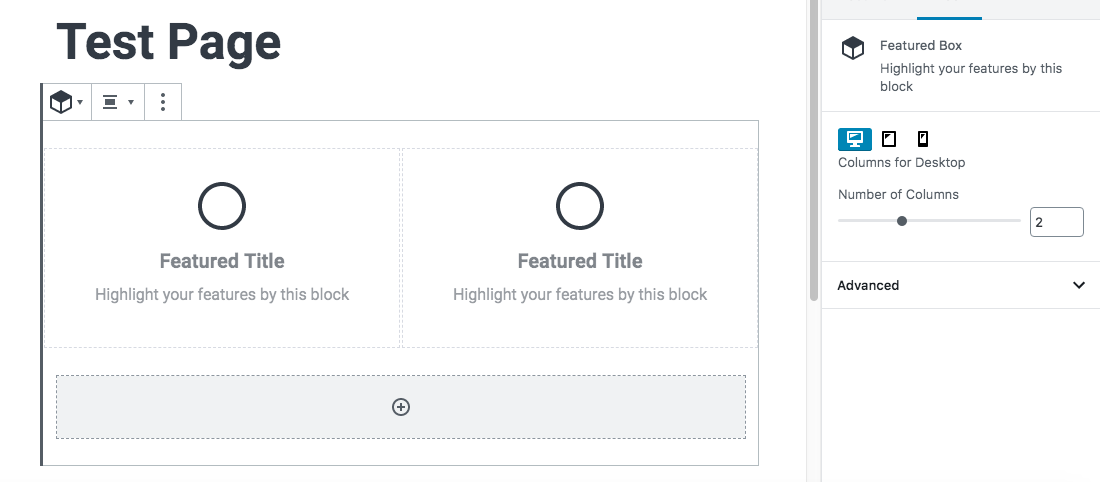
Now after this, we can edit Featured Icon Block, here you can change alignment of block, select icon you want, edit its size, edit icon, title, info and background colors. Don’t forget to change title and info:
![]()
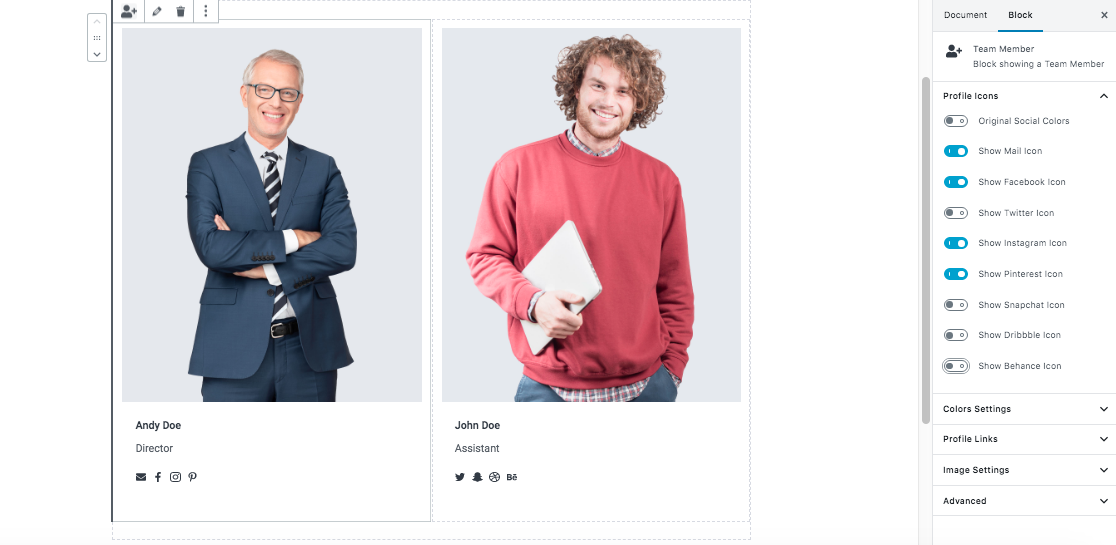
Team Members
Inside the block are Team Member blocks, you can easily add or remove it, change columns for desktop, tablet and mobile screen sizes, change alignment of block:
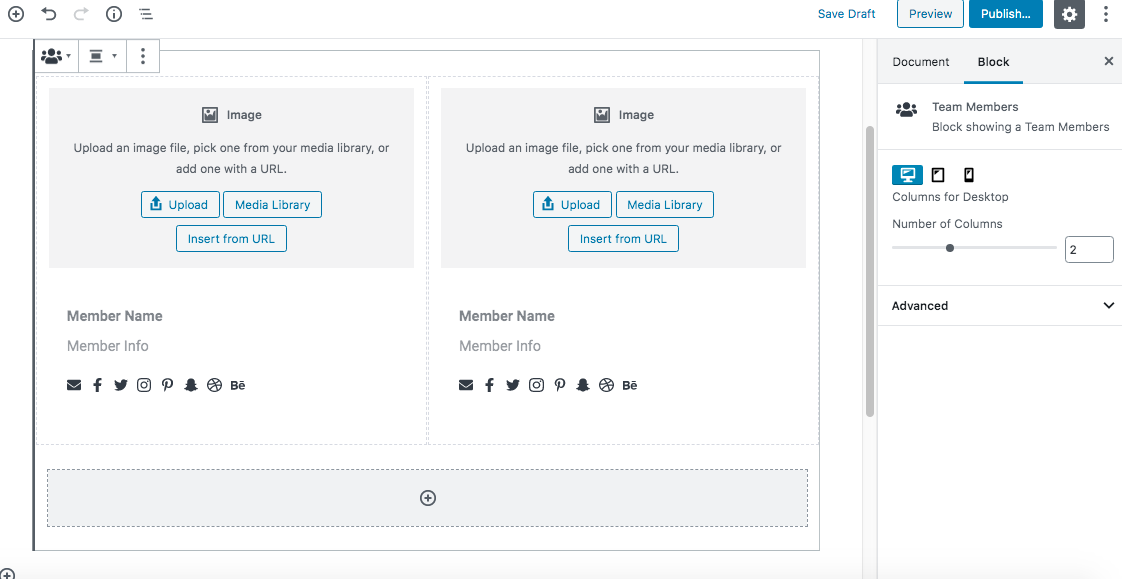
Now after this, we can edit Team Member block, here you can add image, change Member Name and Info. Activate profile icons you want, edit member name, memeber info and icons color, edit links and image settings:
Social Profiles
Prompt visitors to take action with links to social media profiles. Try to choose Social Profiles and change settings you want. You can edit icon size, change color, display social profiles you want and add links to them.
Contact Info
Prompt visitors to take action with links to social media profiles. Try to choose Contact Info and change settings you want. You can hide or change columns, hide icons, edit icon, title font sizes, change colors and add information for every column.
Scroll Animation
Animate your elements on scroll by this block, just include your elements inside. Try to choose thanx Scroll Animation and change animation you want. You can set animation by fade in, fade up, fade down, fade right or fade left.
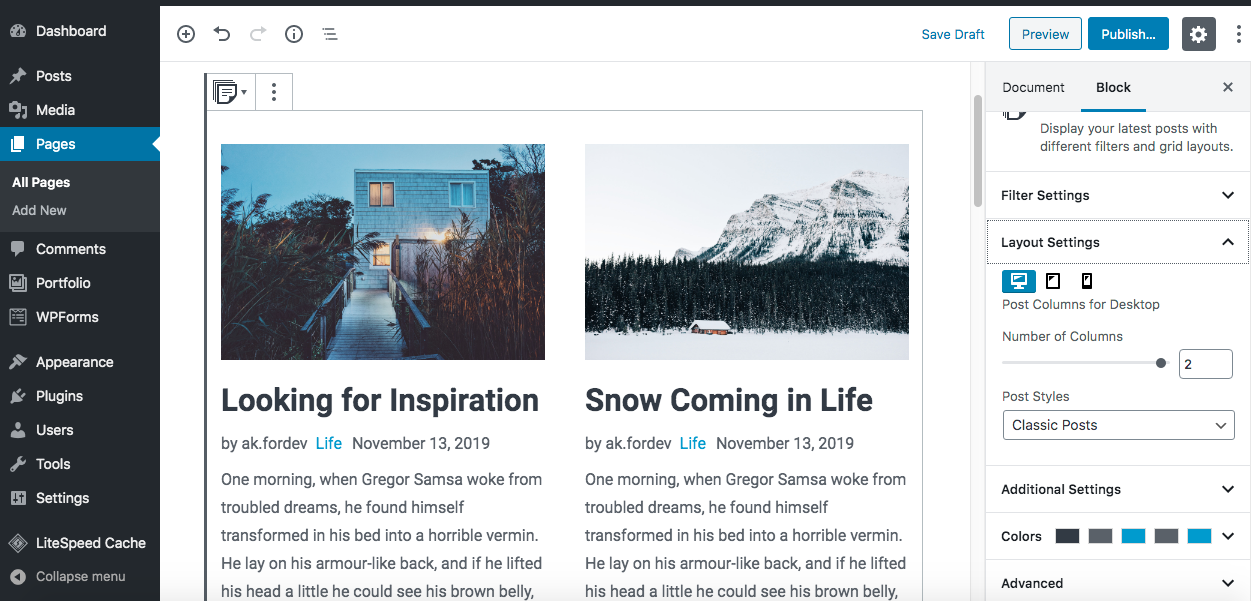
thanx Latest Posts
Display your latest posts with different filters and grid layouts. It’s a dynamic block, so content will be loaded automatically from Posts. You can filter your posts by Newest to Oldest, Oldest to Newest, A to Z, Z to A and categories. Easily change columns for desktop, tablet and mobile layouts. Edit Post Style. You can hide post author, categories, date, tags, excerpt and read more button. Don’t forget to change color for every element:
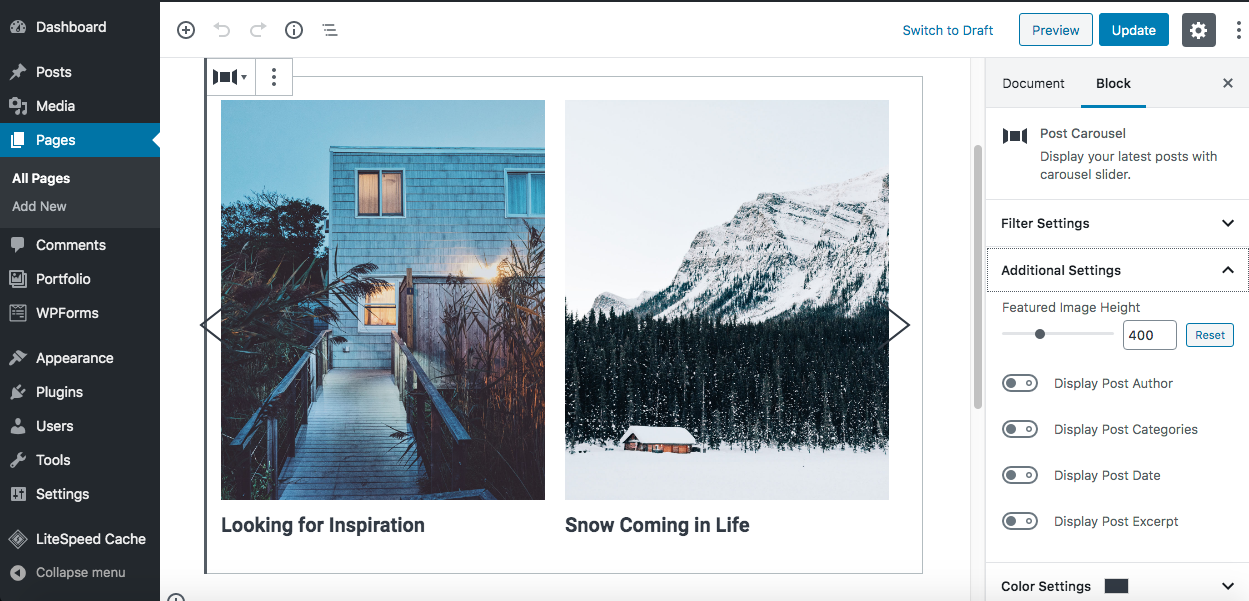
Post Carousel
Display your latest posts with carousel slider. It’s a dynamic block and has exactly the same settings as thanx Latest Posts, except here you can’t change columns and this block doesn’t show tags and read more button. But here you can change featured images height.
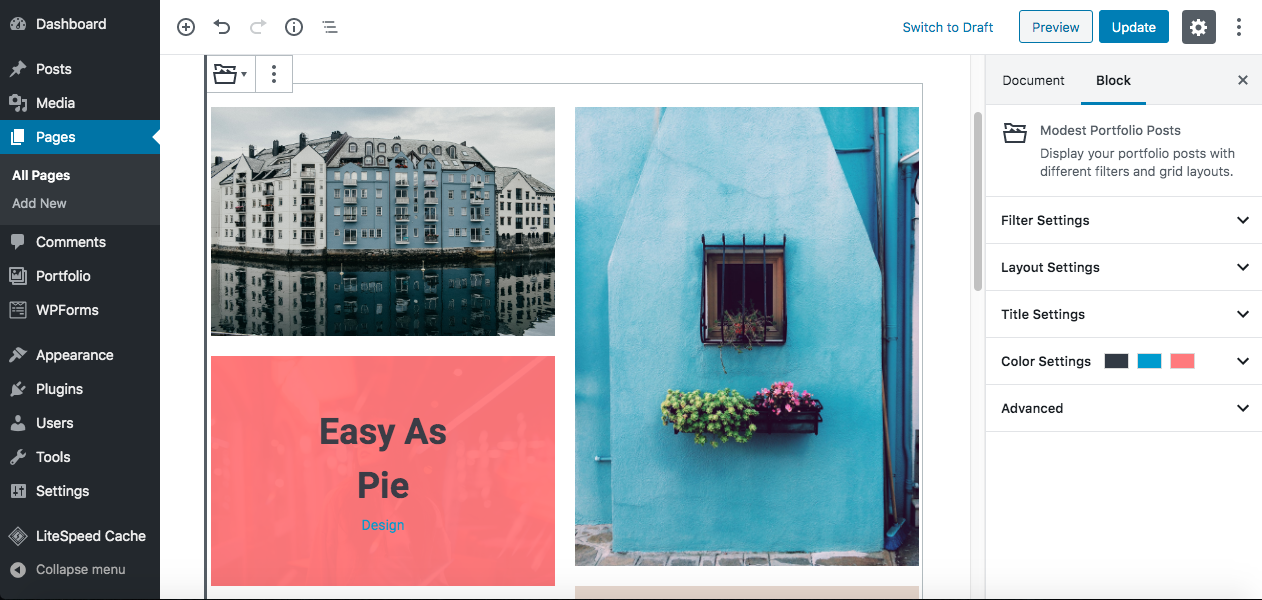
thanx Portfolio Posts
Display your portfolio posts with different filters and grid layouts. It’s a dynamic block, so content will be loaded automatically from Portfolio. You can filter your portfolio posts by Newest to Oldest, Oldest to Newest, A to Z, Z to A and categories. Easily change columns for desktop, tablet and mobile layouts. It has 3 styles:
1. Classic Masonry
2. Without Space
3. Creative Masonry
You can hide portfolio categories and change title font size. Don’t forget to change color for every element.
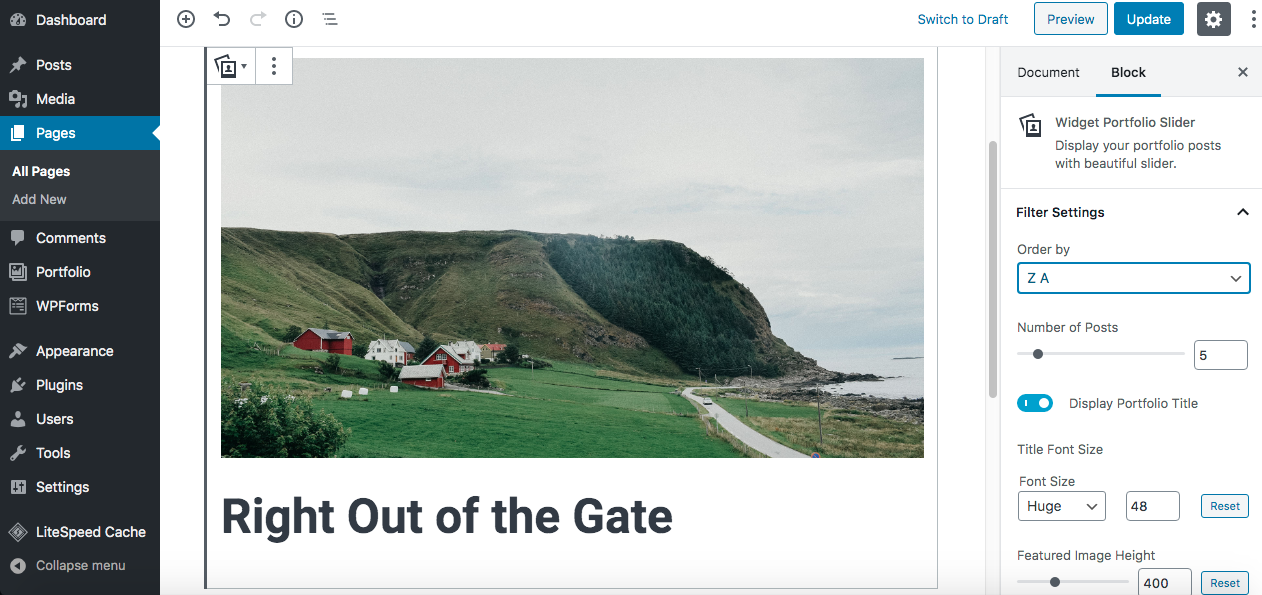
Widget Portfolio Slider
Display your portfolio posts with beautiful slider. It’s a dynamic block and has exactly the same settings as thanx Portfolio Posts, except here you can’t change columns and this block doesn’t show categories. But here you can change featured images height.
Widgets Post Grid
If you didn’t add widgets to Primary Sidebar, you can add widgets in your content. Gutenberg Editor has widgets, this block will help to arrange them correctly. It consist of 2 blocks:
1. Post Column
2. Widget Column
Just add your content in Post Column and widget to Widget Column.
Revolution slider
First please import all the slides from a folder DemoContent/Revoslides using Revoslider import
- Documentation: slider-revolution-documentation
Documentation: https://templines.com/go/revslider-doc/ Video tutorials: available on YouTube
If you are unfamiliar with this awesome plugin, we recommend that you use the online documentation
You can use these plugins with the thanx theme and you are fully compliant with the Envato’s policy, but you cannot activate them as the owner (so don’t try to use the thanx purchase code to activate one of these plugins).
When you purchase a theme from ThemeForest that bundles WPbakery and Revolution Slider, you are free to use these Premium plugins with the theme. However, your thanx purchase does not give you individual WPbakery and Revolution Slider licenses that allow you to activate or download these plugins as you wish. Activation doesn’t mean the plugin will not work but only that you cannot receive direct updates. Please don’t worry if you see warning messages about the plugin license activation.
To update you need:
- Navigate to the Plugins menu in your WordPress admin area.
- Deactivate revolution slider, delete it
- Go to Install Required Plugins
- Upload and install the new version
- Activate slider.
Jivo Chat
You can add your chat using Jivochat service . To do this, register on site Jivochat and get the code that you need to add to Kaswara-Settings .
Auto-Updating
The Envato Market plugin can install WordPress themes and plugins purchased from ThemeForest & CodeCanyon by connecting with the Envato Market API using a secure OAuth personal token. Once your themes & plugins are installed WordPress will periodically check for updates, so keeping your items up to date is as simple as a few clicks.
You can add a global token to connect all your items from your account, and/or connect directly with a specific item using a singe-use token & item ID. When the global token and single-use token are set for the same item, the single-use token will be used to communicate with the API.
Manual Updating
You can update your theme manually by performing the following steps:
- Download the latest theme zip file from ThemeForest
- Extract it and locate thanx.zip
- Extract thanx.zip and locate the thanx folder
- Copy/Replace content of the thanx folder to the /wp-content/themes/thanx folder of your web site.
Speed and Optimization
Enable – Compress pages so they’re served more quickly to visitors. (Recommended)
-
- Added in .htaccess this code
ExpiresActive On
ExpiresDefault "access plus 6 month"
ExpiresByType text/css "access plus 6 month"
ExpiresByType text/plain "access plus 1 year"
ExpiresByType text/woff "access plus 1 year"
ExpiresByType image/gif "access plus 1 year"
ExpiresByType image/png "access plus 1 year"
ExpiresByType image/jpeg "access plus 1 year"
ExpiresByType application/x-javascript "access plus 6 month"
ExpiresByType application/javascript "access plus 6 month"
ExpiresByType application/x-icon "access plus 1 year"
- 6. Enable NGINX caching
- 7. Configure the server to display correctly WEBP images (you can use Shortpixel for generate this type of images)
Changelogs
All information about updates here Appearance – About theme
